CheckBox Odoo Instruction by Unitsoft
1. Registration on the CheckBox portal
Register in Checkbox. This video instruction will help to understand and register the cashier and cash register.
To start working, it is first necessary to register on the portal CheckBox. Registration is quick and easy — just follow the system prompts.
During the registration of the point of sale (form 20-OPP), cash register (form 1-PRRO) and cashier (form 5-PRRO) all entered data is automatically transmitted to the tax service.
Registration is carried out through the appropriate form in the personal cabinet CheckBox.
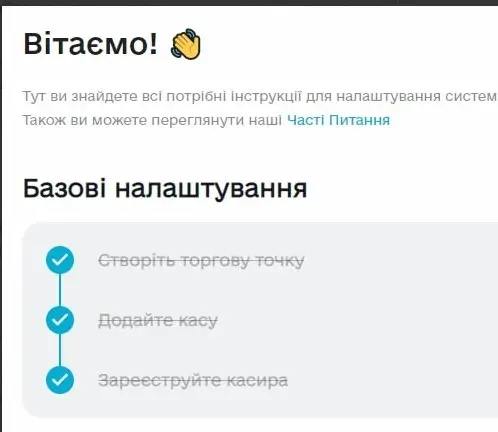
After this, to set up the integration Checkbox from Odoo, it is necessary to perform basic settings directly in the Checkbox cabinet interface. For this, use the step-by-step instructions «How to start».
Point of Sale
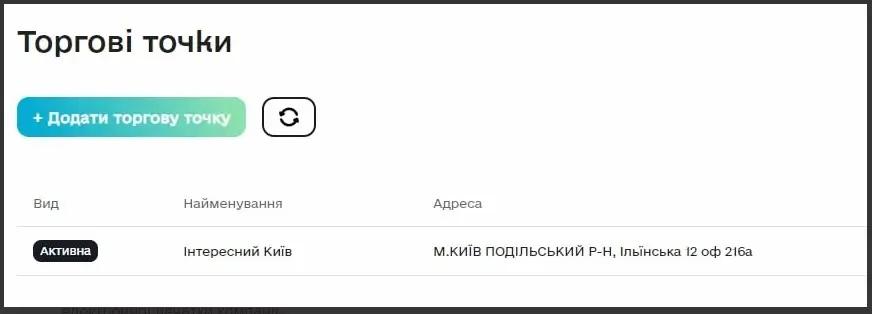
If you have not yet created a point of sale, it is necessary to add "Point of Sale" according to the instructions . Wait for confirmation from the tax service with the status 'Active'.
This step can be skipped if the points of sale were registered earlier and you plan to connect the software cash register to an existing point.
Registration of a software cash register in the 'Cash Registers' menu is automatic
After activating the point of sale, it is necessary to add a cash register and a cashier.
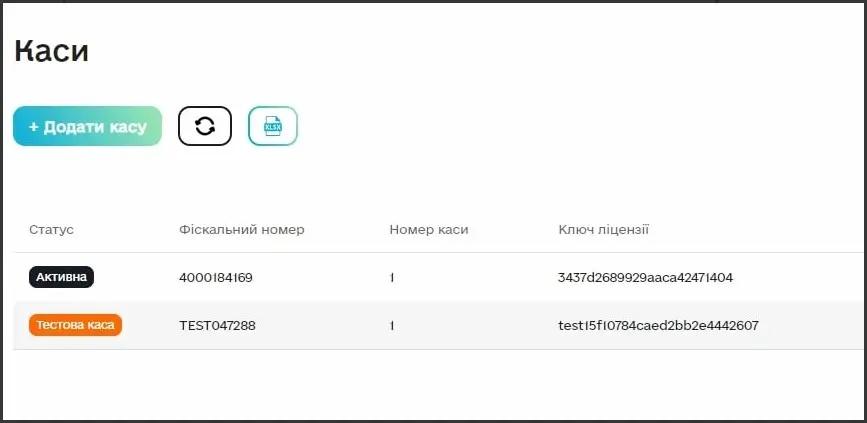
In the interface Checkbox the cash register is created immediately with two statuses:
- Active - for work;
- Test cash register - used for conducting test payments.
In the section «Registers» during the cash register setup, it is important to pay attention to the fields "Fiscal Number" and "License Key". These data are used for registering the cash register in the system Odoo.
License key — this is a unique 24-character code of the cash register, which is used to establish a connection between the module CheckBox in Odoo and the corresponding cash register.
Cashier
The next step is to add cashiers to the appropriate cash register. For this, it is necessary to register cashiers in the section «Cashiers». Go to the menu «Registers», press the button "Add Cashier" and perform all actions according to the CheckBox step-by-step instructions. After completing the registration, the cashier will appear in the list of cashiers.
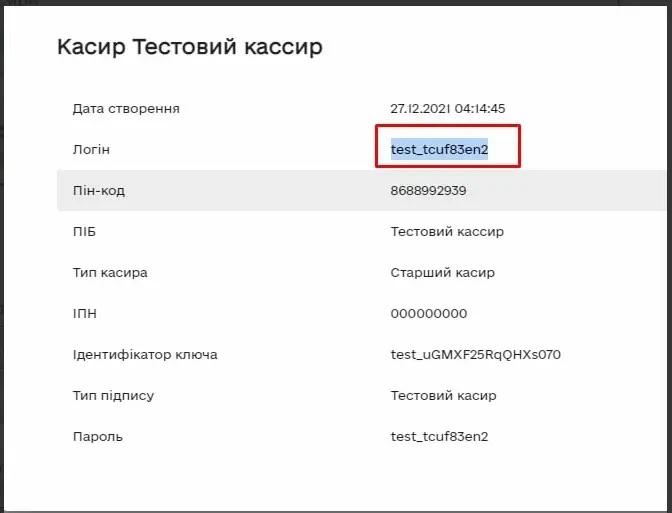
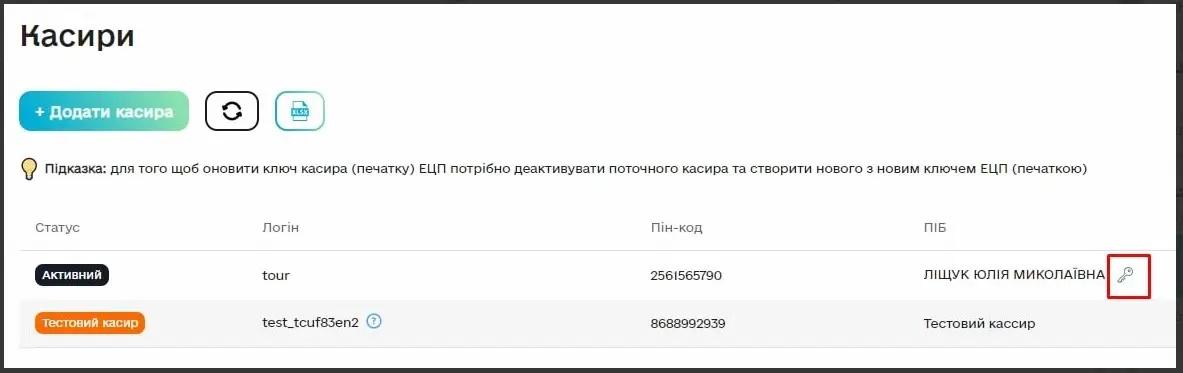 Note that for test cashier the login and password are the same — these data are used during integration with Odoo for adding a test cashier.
Instead, when setting up active cash registers and cashiers the values from the 'Login' and 'Password' fields, which are different, are used.
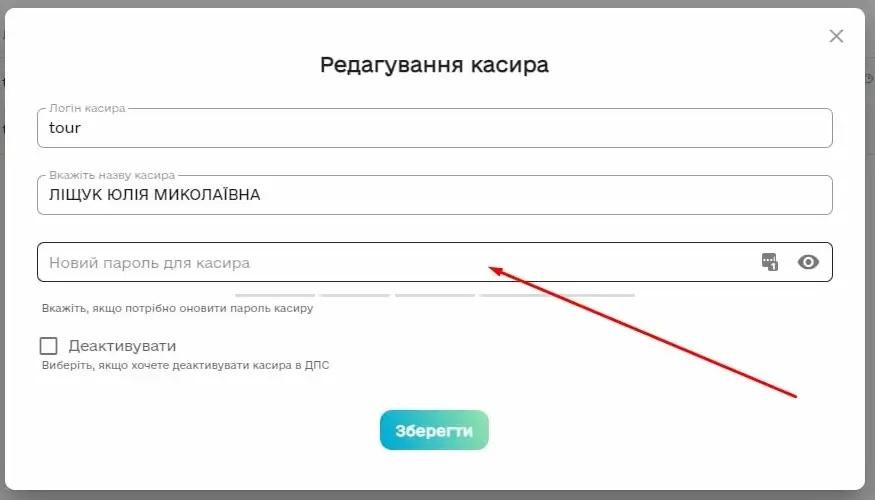
To change the cashier's login and password, it is necessary to go to the settings in the section "Edit Cashier".
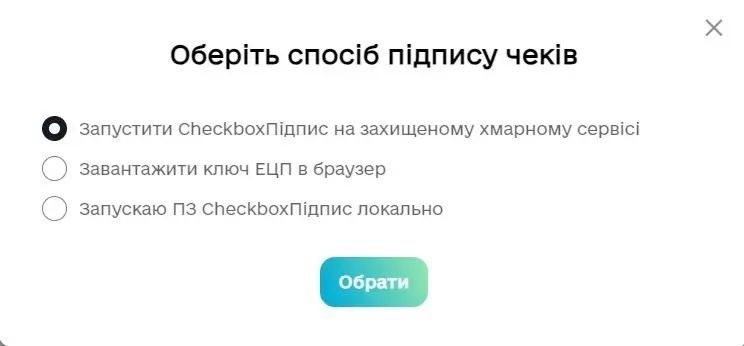
For the cashier, it is mandatory to check and set the method of signing checks. It is recommended to choose the option «Launch CheckboxSignature on a secure cloud service», which reduces the number of additional actions for the cashier during payment processing.
2. Cash register configuration setup
2.1. Direct API
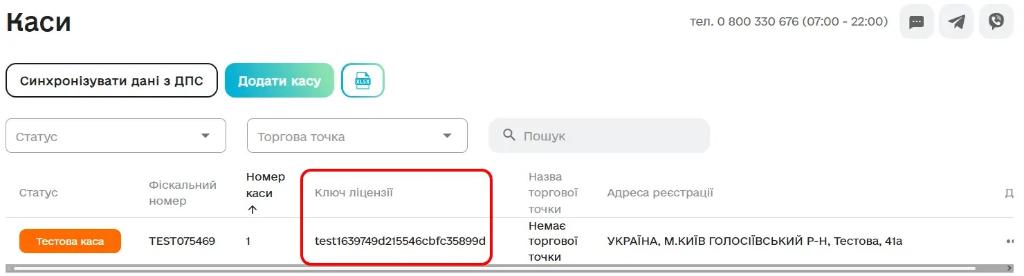
Log in to your Checkbox cabinet, open the section Cash Management and copy and save cash register license key, which will be used for further PRRO setup.
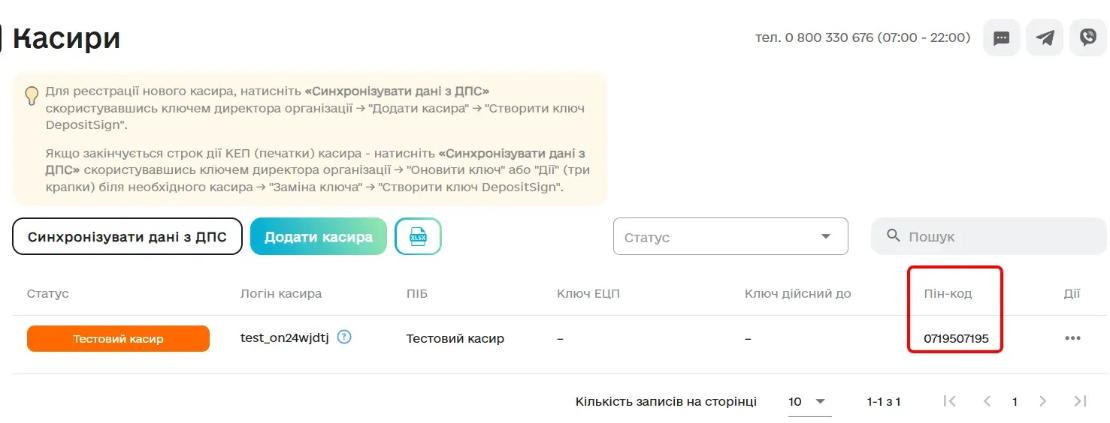
Next in the cabinet Checkbox go to the section cashier management and save cashier's PIN code:
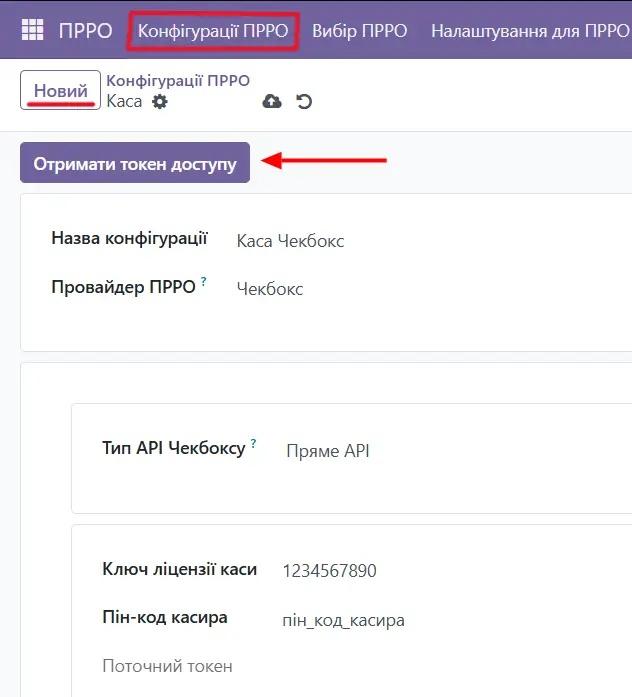
At the next stage, it is necessary to create a new configuration in the menu "PRRO Configurations" module «PRRO».
To do this, press the button «New» and proceed to fill in the parameters. In the field "PRRO Provider" select the value «Checkbox». Next, specify unique configuration name, which will allow easy identification among others (for example, by the name of the point of sale or cash register). In the parameter «API Type» select «Direct API».
After this, fill in the access data, namely:
- cashier's PIN code, saved at the previous setup stage;
- cash register license key.
After correctly filling in all the mandatory fields, a button will appear "Get Access Token". Press it — in response, the system will receive an authorization token, and the field "Current Token" will update automatically.
If the button is not pressed manually, the system will attempt to obtain the token automatically during the first request to the PRRO.
Attention!
One active cashier can have no more than three active access tokens simultaneously. After obtaining a new token, all previous tokens become invalid, and using the cash register with them will be impossible. If there is already an active token in the configuration, a button will be available next to it «Deactivate access token and obtain a new one».
Using this button allows:
- deactivate the current token;
- immediately generate and save a new access token for further operation of the cash register.
2.2. Through the Kasa Manager checkbox
Download and install Checkbox Kasa Manager, after which create a cash register profile and perform all necessary settings according to official instructions (click to view).
Next, proceed to the setup in PRRO modules. In the created configuration must specify:
- PRRO type — «Checkbox»;
- unique configuration name;
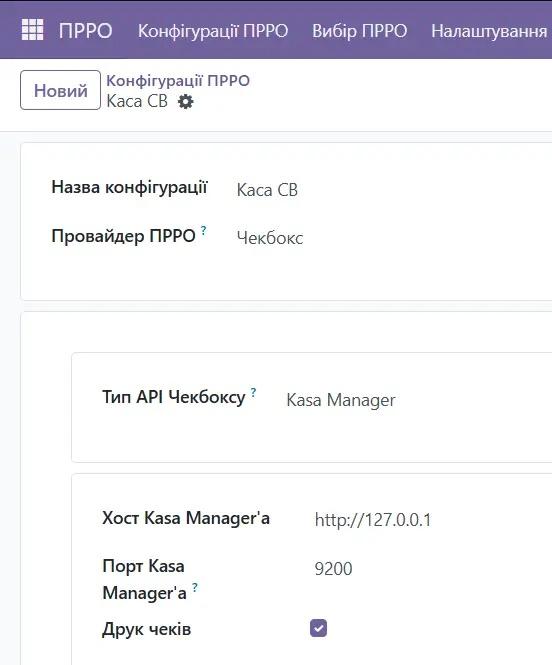
- API type — "Kasa Manager";
- URL Kasa Manager (usually http://127.0.0.1);
- port Kasa Manager (as a rule, 9200);
- parameter printing checks (for correct printing, it is necessary to pre-configure check printing in Kasa Manager).
URL address and port are set and, if necessary, edited directly in Kasa Manager separately for each cash register. A detailed description of these settings is provided in the instructions at the links above.
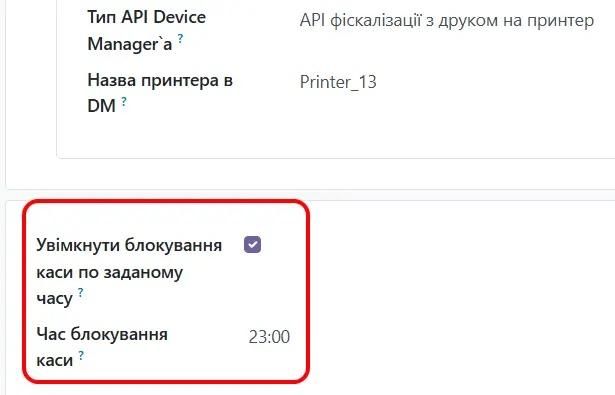
Also in this section, you can configure time of automatic sales blocking in the cash register.
For Vchasno.Kasa restriction applies to session duration up to 24 years, and for Checkbox an additional requirement is applied mandatory closing of the cash register on the same day, in which it was opened.
In case if blocking at a specified time not selected, the system will automatically disable this parameter for Checkbox, to avoid errors in the operation of the cash register.
For 2 years before the blocking time occurs the user will start periodically receiving warning messages. After reaching current day blocking conducting sales will become impossible — only the action will be available register closure.
3. Creating a point of sale
The next step is to create point of sale in the corresponding module menu "Point of Sale". Switch the display mode to list and press the button «New» to create a new entry.

Specify store name and be sure to choose the required PRRO configuration. In case of use PRRO not needed, just clear the appropriate field.
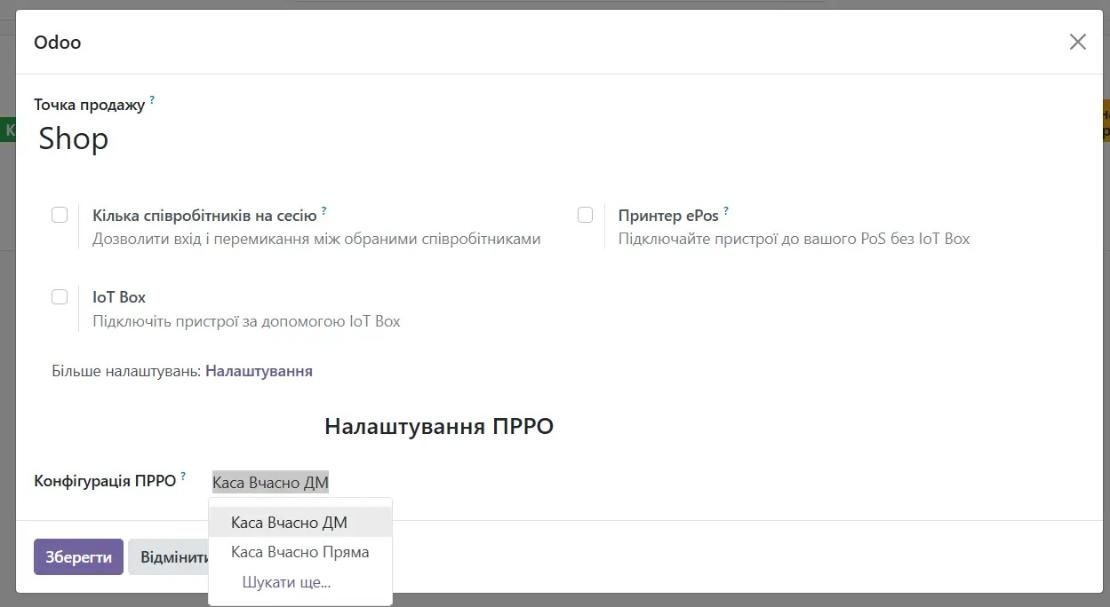
User with administrator rights can proceed to point of sale settings and if necessary change the assigned PRRO configuration.
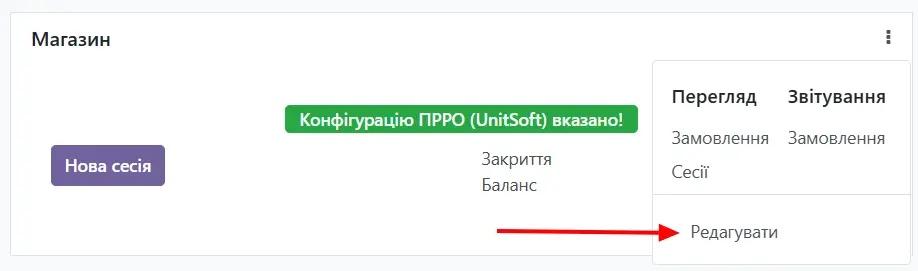
If PRRO configuration was not specified, the user will see appropriate warning message.
If the configuration is set correctly, it will display green information message from name of the selected configuration.
4. General settings of the point of sale
Let's move to point of sale settings. To do this, open the menu "Point of Sale", switch the display mode to list and choose point of sale, for which it is necessary to make changes.
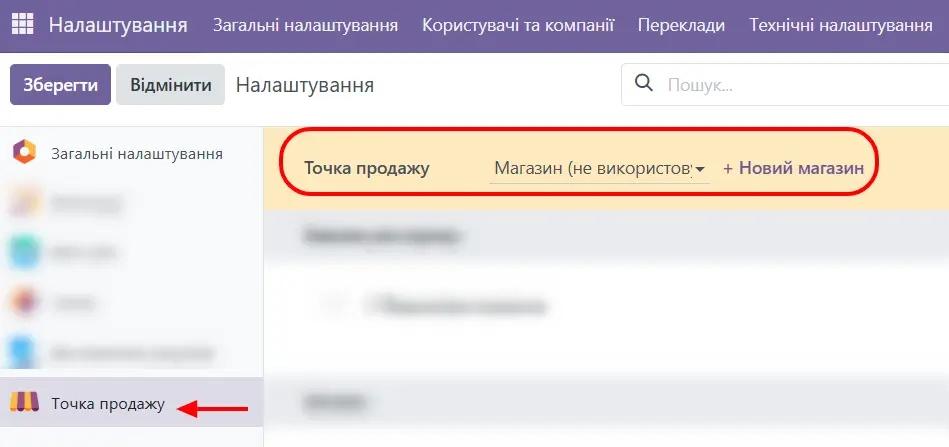
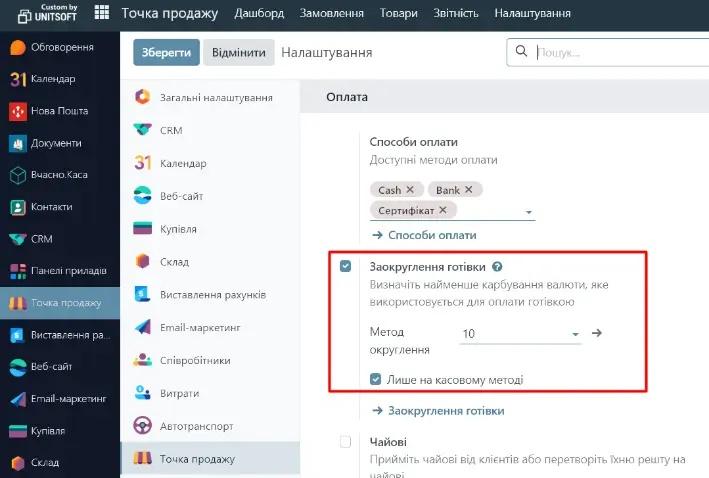
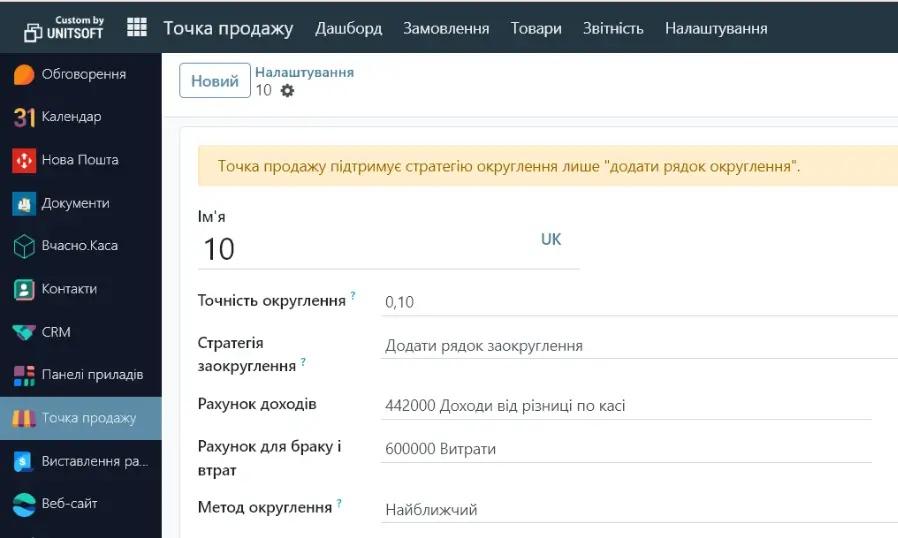
At this stage, it is necessary to configure rounding of cash transactions.
Without this, the formation of checks with cashless amount, for example 3 kopecks, which is prohibited.
Be sure to set the parameter "Only on the cash method", to rounding was applied exclusively to cash and did not affect other payment methods.
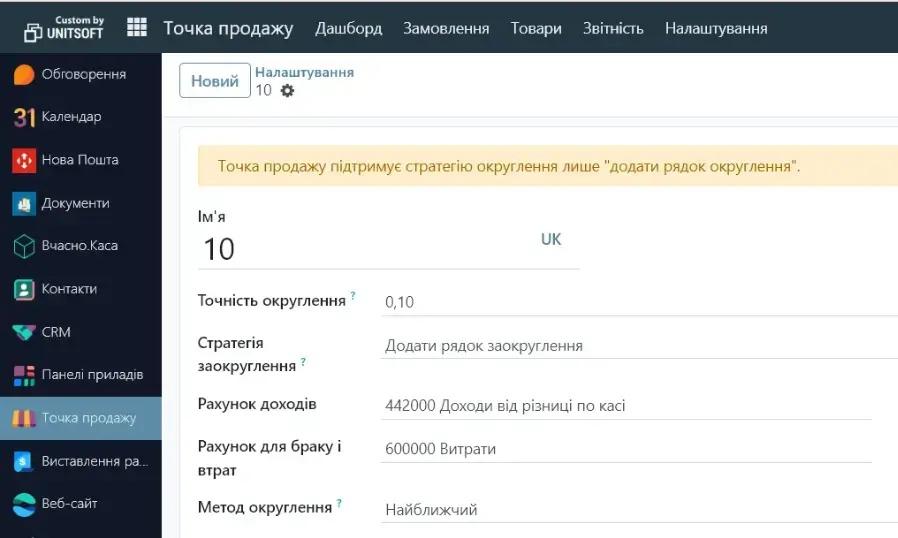
In case of the need to work with overall check discounts in the settings of the corresponding point of sale check the box "Total Discount".
For correct operation of the functionality, be sure to leave "Tovarka" settings unchanged, as shown on next screenshot (values set by default).
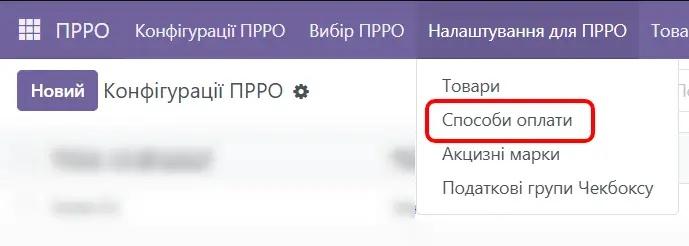
Next, go to payment method settings in the module menu «PRRO» or through the module menu "Points of Sale", as shown on screenshot.
For cash payment additional settings for Checkbox not needed.
For cashless payment methods the appropriate settings are mandatory.
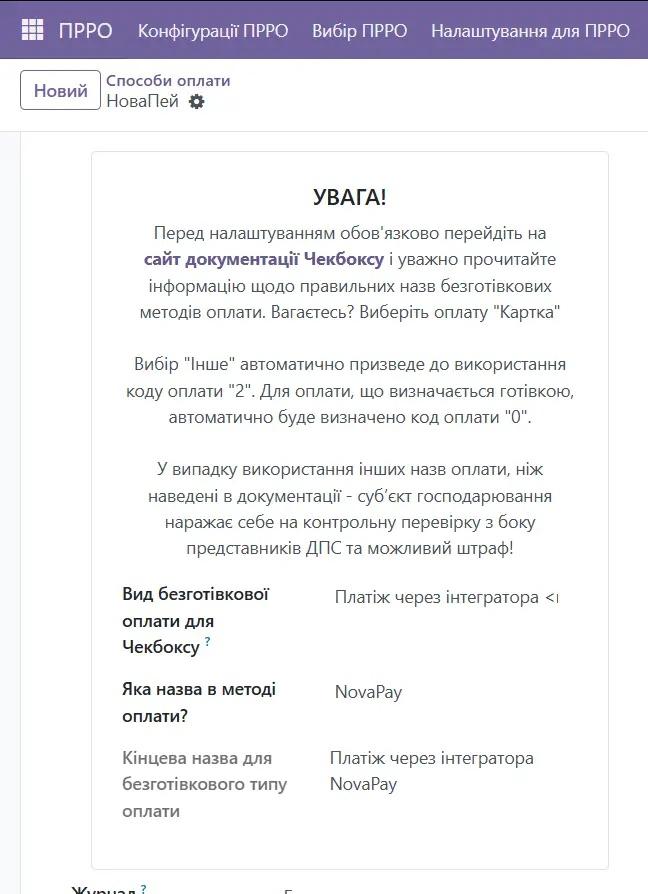
After creation cashless payment method must select «Type of non-cash payment for Checkbox» from drop-down list.
If it is necessary to display the payment method name on the receipt, specify it in appropriate field — after this, the system will display the full name at the bottom.
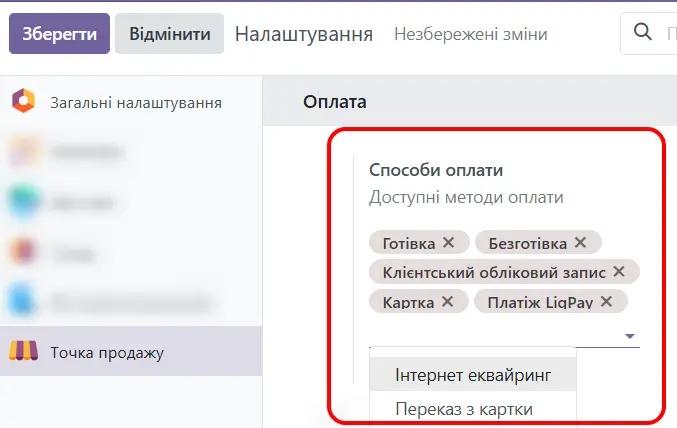
After that, return to point of sale settings and select summary of sales payment methods for the corresponding points of sale.
The next step is — product settings.
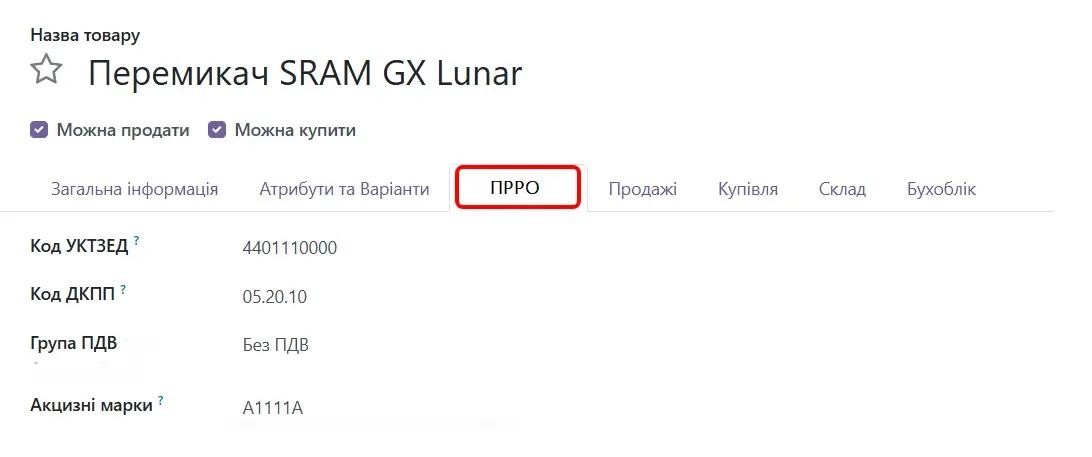
During creating or editing a product on the tab «PRRO» can specify:
- UKTZED codes and DKPP (if necessary);
- VAT group — mandatory (determines which VAT group the product will be interpreted as during fiscalization in Checkbox; more details — in the following sections);
- product taxes in Odoo — configured separately, if necessary;
- excise stamp (or several stamps, if more than one is provided for the product).
- VAT 20%
- Without VAT
- VAT 20% + excise 5%
- VAT 7%
- VAT 0%
- Without VAT + excise 5%
- Not subject to VAT
- VAT 20% + PF 7.5%
- VAT 14%
- PIT 18% + military levy 1.5%
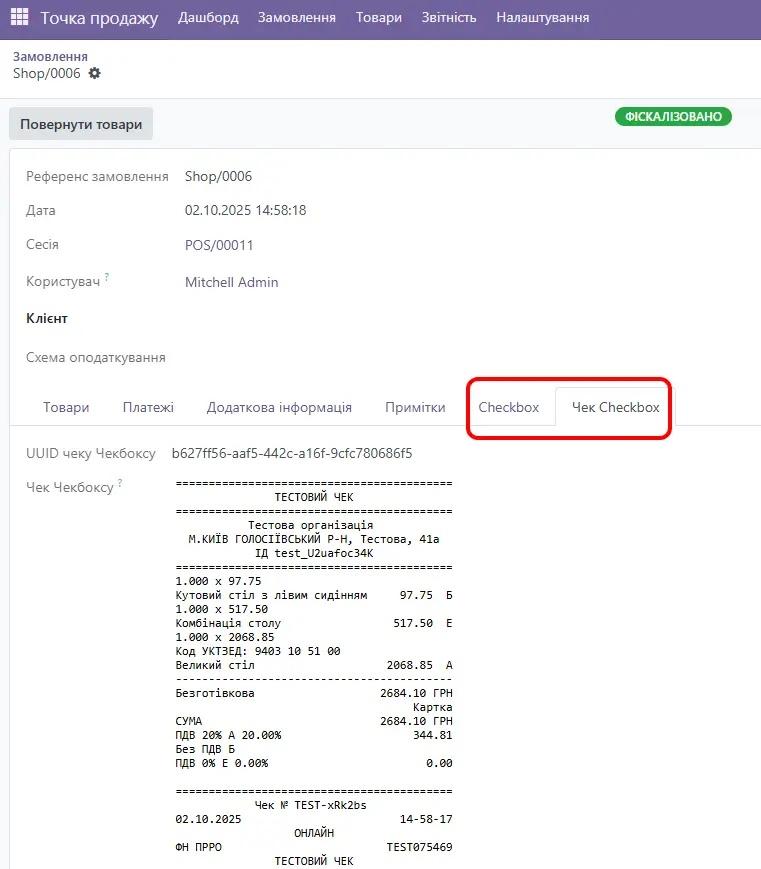
- «Checkbox» — available only to users with administrator rights; in this tab, it is displayed information about requests to the PRRO provider and received responses;
- «Checkbox Check» — contains fiscal receipt in text form.
Next - a mandatory step, setting up the VAT group
First, familiarize yourself with available VAT types in the system:
After that, go to setting up tax groups in the Checkbox cabinet and create tax groups according to the available VAT types.
Example of setting shown on next screenshot.
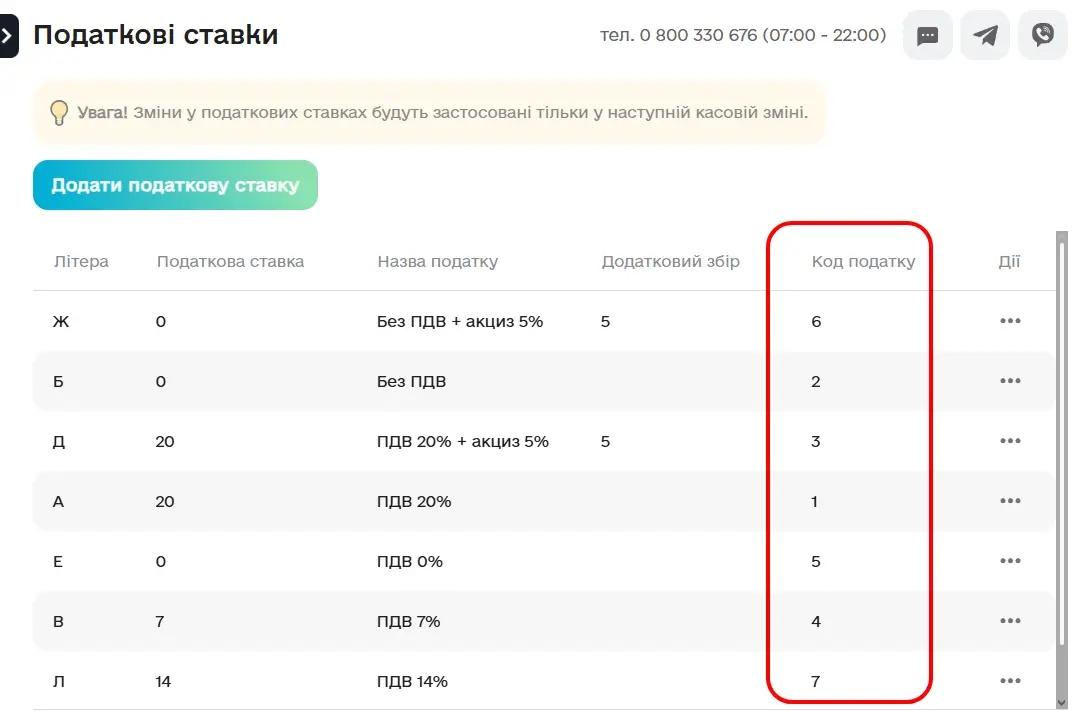
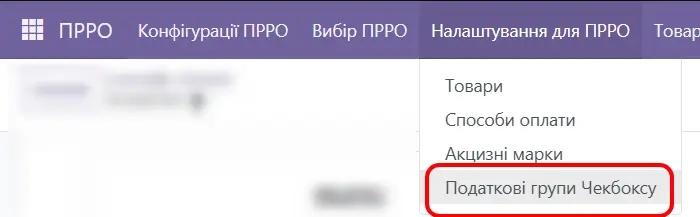
After this, proceed to the module «PRRO», in settings select item "Tax Groups Checkbox" and open it.
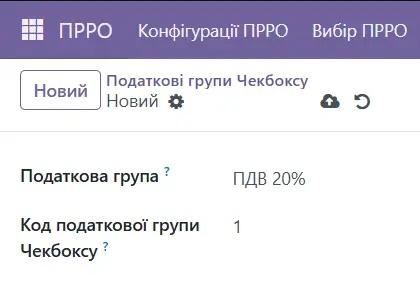
Create tax groups, establishing a correspondence between «Checkbox tax group code» (this tax code, which you specified when creating tax groups in Checkbox cabinet, as shown in the previous screenshot) and "Tax Group", selected from available in the system.
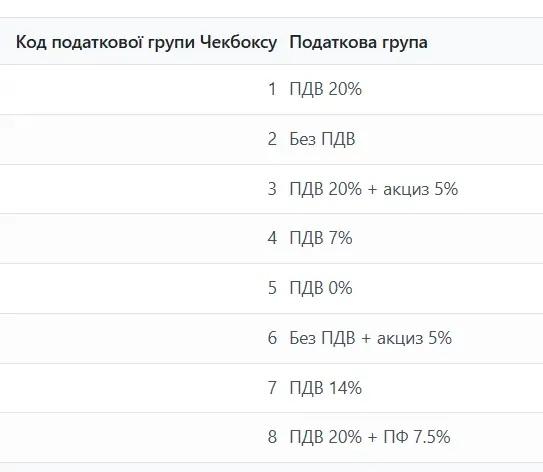
VERY CAREFULLY CHECK the accuracy of the data entry!
Example of filled tax group correspondences:
Everything is set up - you can work!
5. Using the module at the Point of Sale. Front system
After completing all the above-mentioned settings and selection PRRO configuration for the cash register, you can proceed to work.
Go to the module "Point of Sale" and press the button «New session».
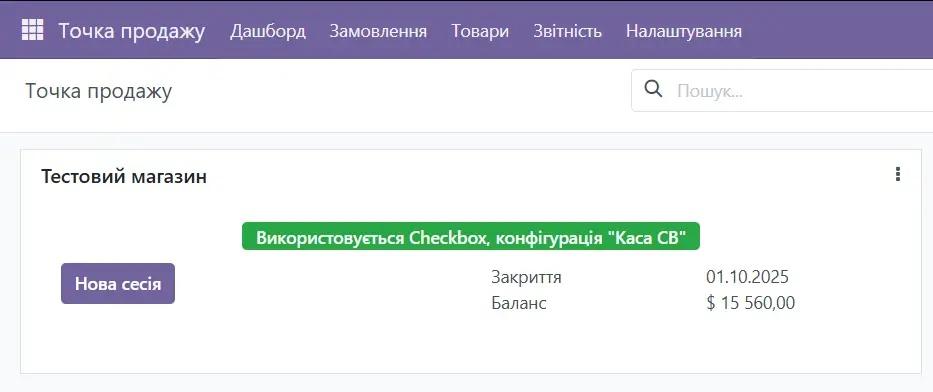
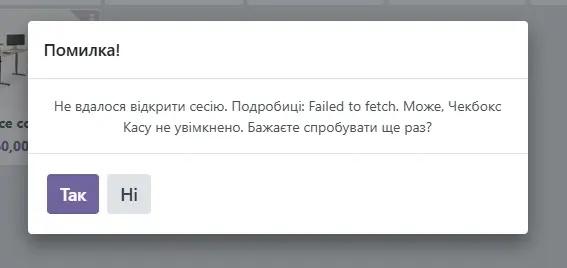
System tries to open the shift for the corresponding registers. In case of failure, it will display error message with indication possible reason.
If you are sure that session already open, can reload the page or ignore the message.
If, for example, Checkbox Kasa was not enabled, enable it and try again, by pressing the button «Yes».
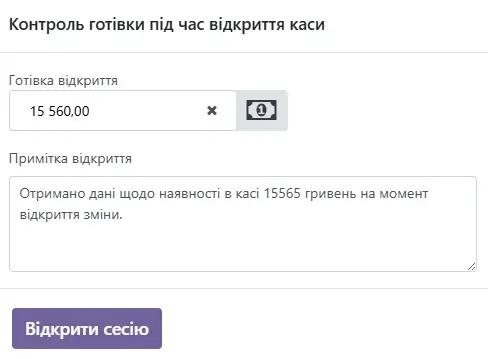
After successful shift opening, if available connected cash payment method, will open window with information about the current state of the cash register.
In input field will be specified cash amount in the cash register according to Odoo, and in note — data on the amount of cash received from PRRO.
In case of detection discrepancies it is recommended adjust the cash amount, specified in note, to the actual value.
After this, you can proceed to fiscal operations: sale, return, official deposit or official cash issuance.
For connected PRRO fiscalization is performed automatically during the execution of each of these operations.
Next to the menu is displayed time indicator until sales blocking by cash register.
In case of approaching the closing time, the indicator changes color to yellow, and after blocking — on red.
In these cases, the system periodically displays warning messages. After cash register locking execution fiscal operations becomes unavailable.
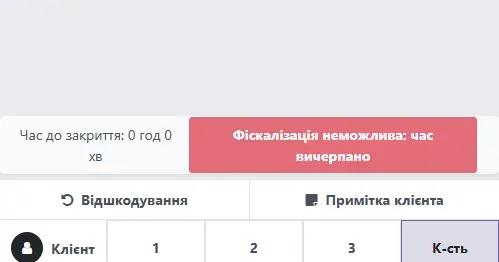
In case during sale or return unable to fiscalize the receipt, the user will see message with error description and, in some cases, possible ways to eliminate it.
Operation sale or return will not be completed until fiscalization error will not be eliminated.
Note: PRRO does not allow creating a receipt, in which simultaneous execution of sales and return of goods. This restriction applies to Checkbox, as well as for Vchasno.
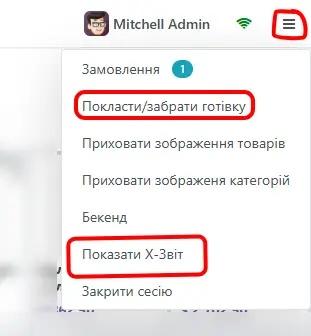
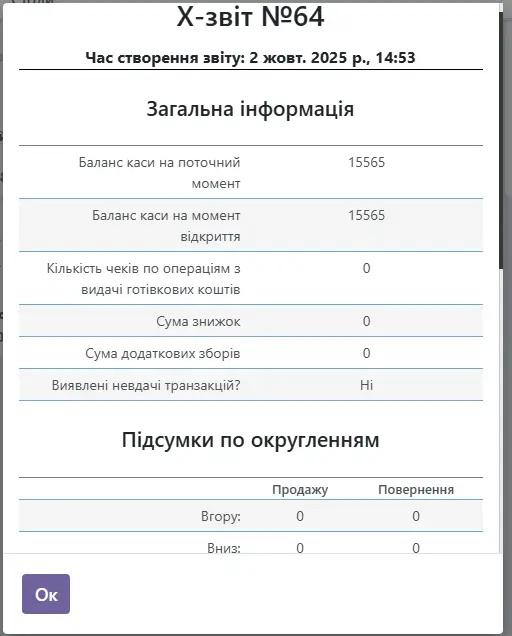
To execute X-report open burger menu to the right of the viewing area and press appropriate button.
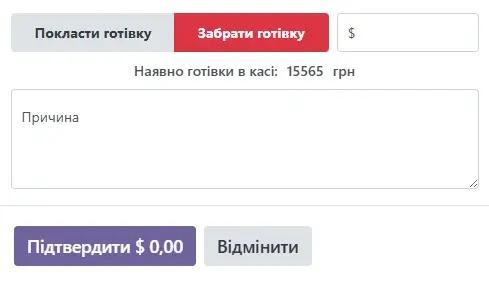
In this menu, operations are available official deposit and official cash issuance through the button "Deposit / withdraw cash".
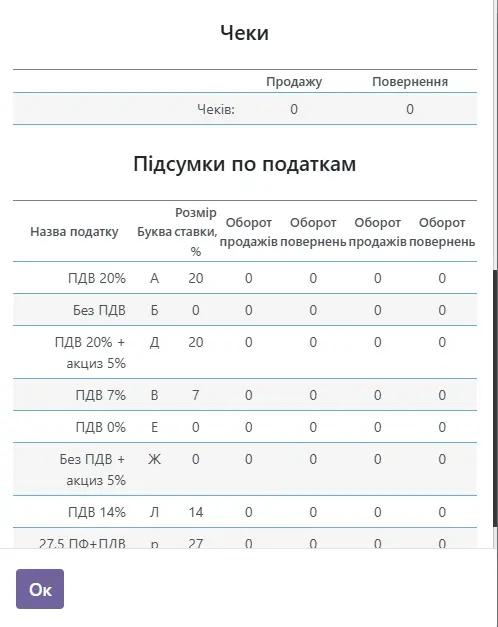
 Example of "empty" X-report:
During execution service operations with cash displayed current cash amount in the register. Withdraw cash in the amount that exceeds the available balance, impossible.
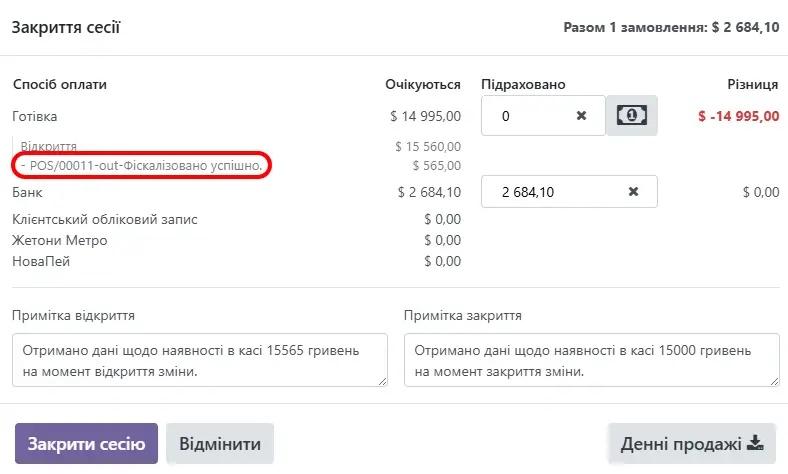
During session closure information is displayed regarding cash in register, similar to that shown during opening: amount according to Odoo and amount according to PRRO.
Also displayed full list of cash operations and information about completed payments.
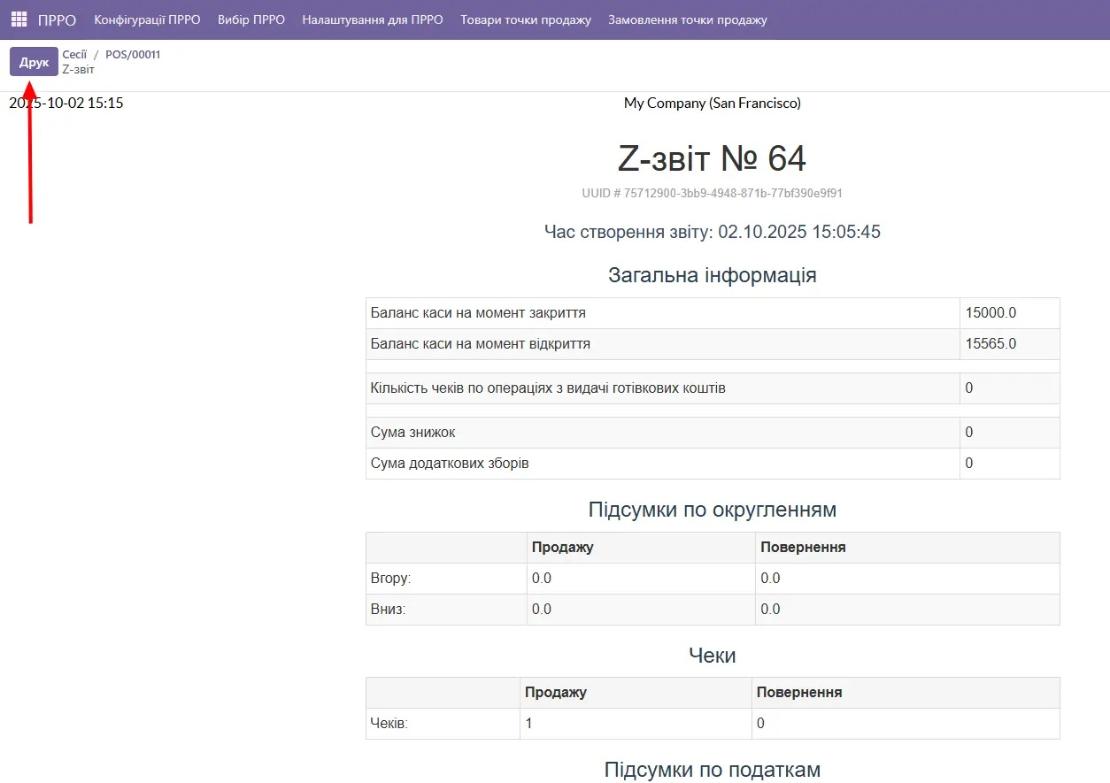
After pressing the button "Close Session" system will generate Z-report, will display it in in a format similar to the X-report, and will save all relevant information.
In case of an error, it will be displayed to the user in the form of an appropriate message.
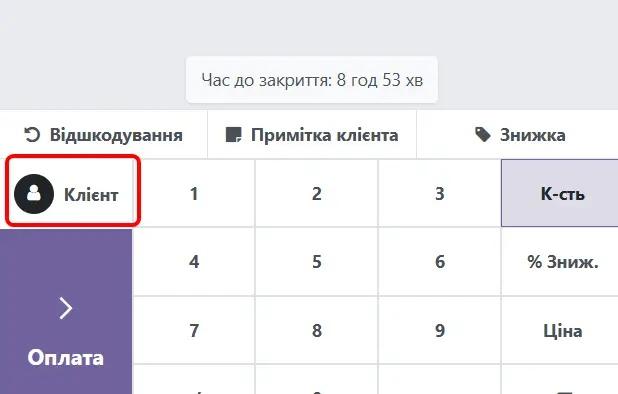
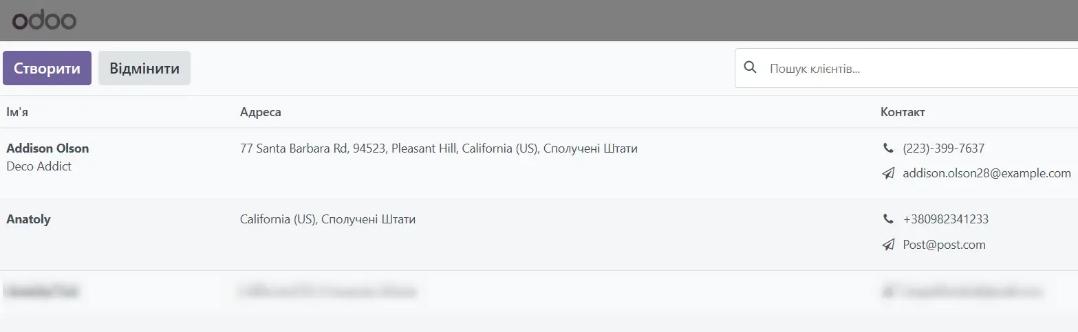
For sending a receipt to the client during payment, it is necessary to choose client account.
If specified in the account email address, check will be sent to e-mail.
If specified mobile phone number, check will be sent in Viber provided that in in the Vchasno.Kasa cabinet connected and paid sending messages.
6. Using the module at the Point of Sale. Backend
After moving to order become available two new tabs:
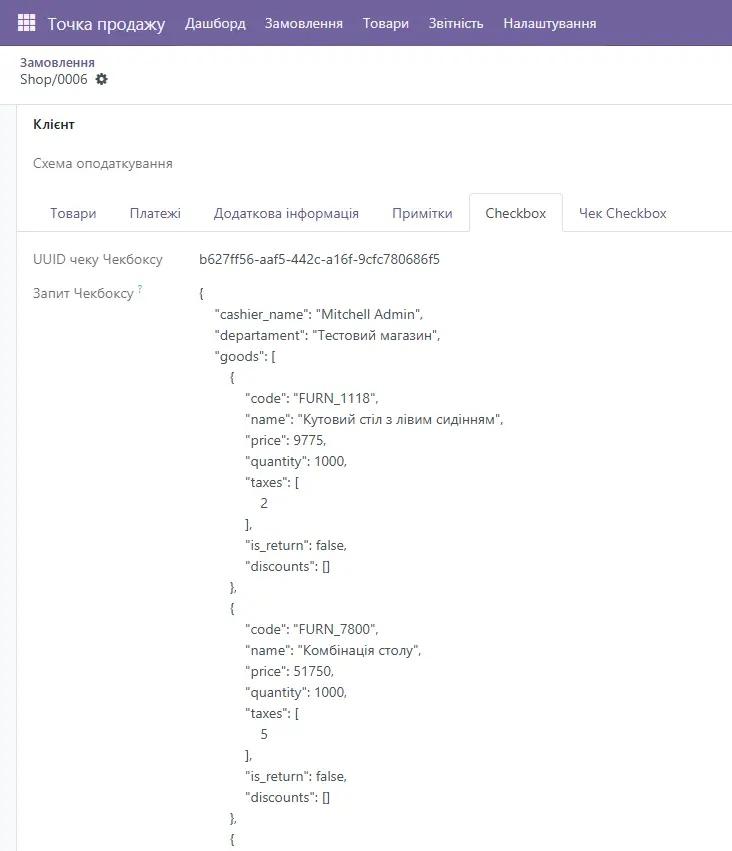
After moving to session information become available three new tabs.
Two of them available only to users with administrator rights and contain technical information about queries and responses during opening and closing of the Checkbox session.
Tab "Checkbox Text Report" available to all users and displays fiscal report in text form.
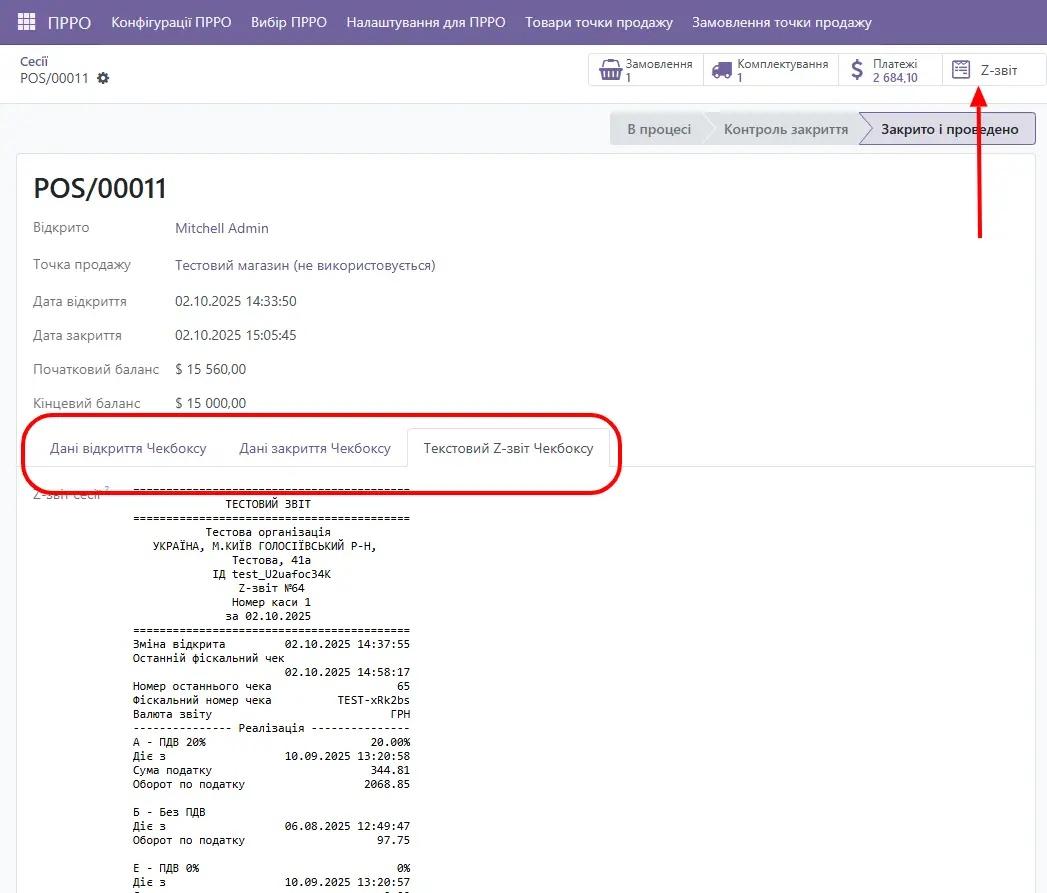
At the top of the screen, a button is available «Z-report», which generates a report for printing in PDF format.